Anyone who’s been in the retail firearms business for any length of time has probably experienced customers coming into your store with an old firearm, asking a cleaning or gun restoration project . The very first step is to make sure the gun is not loaded. Don’t expect the person to have the knowledge to clear the gun and to not bring in a loaded firearm. Check it personally.
These walk-in jobs can range from a quick clean and lube to a full-blown rebuild and restoration project. It is nice to offer a wide range of services to your customers, but you must be cautious not to get in too deep and beyond your level of experience.
This is when having an experienced in-house gunsmith can be very helpful. The gunsmith should be able to inspect the project and estimate the level of time and work that will be required to bring it to completion.
Sometimes you might want to do a basic clean and lube as a no-charge customer service favor while the client watches and learns how to do his own preventative maintenance. What is probably considered a minor task for most people in the gun industry could be considered a major help to someone unfamiliar with firearms. People often appreciate it when you take the time to help them out, which leads to further business in the future.
If you decide to handle a basic clean and lube job for your customer’s firearms education, be sure to explain the process to him/her, and start by making sure he understands firearms safety rules related to the gun-cleaning activity at hand.
Assist your customer further by providing him with written safety rules and instructions related to his particular firearm. Often the owner’s manual can be downloaded from the manufacturer’s website. This will assist your customer in the future when it comes to going through the cleaning process again.
Make sure you provide accurate information about the correct cleaning tools, solutions and lubrications, as well as how to use them. If your store is properly stocked with such supplies, your customers will know where to go when additional purchases are required.
Deep Cleaning Projects
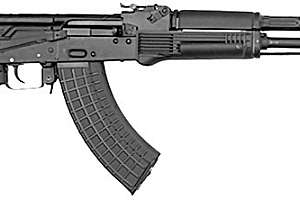
There are times when people will bring in projects far beyond the basic clean and lube job. There might be people who bring in firearms that have not been cleaned for generations and others who bring in literal basket cases of gun parts that someone took apart and could not get back together again.
These are projects that will probably need the attention of your gunsmith and take much more time than a basic clean and lube job. Be sure to remember to take care of proper log-in procedures, as these projects will take a while. If you are taking in project guns via shipments, you might have to explain the proper packing and shipping procedures to your customers.
Some projects will fit into the category of “deep cleaning” jobs. In other words, it is a complete firearm, but it is going to require complete disassembly, cleaning, degreasing, de-rusting and re-lubrication as the situation dictates.
Before jumping into this process, consider the history of the firearm that has been brought in. If you suspect the gun might have some historical value, do some investigative work and make sure that cleaning and minor refinish work won’t devalue the firearm. If the firearm raises suspicions about being stolen — or being a crime gun — be sure to perform these checks as well.
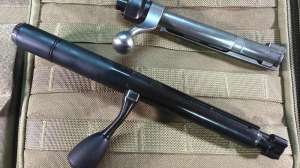
If it looks like you are good to go on a deep cleaning job, a good place to start is removing the furniture (stock and handguard), then treat the metal works to a good dose of penetrating oil to help break the rust free.
Soaking for a few days might be required. When it comes time for complete disassembly, make sure you understand the process, how the gun functions mechanically and how to get it all back together again. You certainly don’t want to turn a semi-functional, but rusty, complete gun into a basket case of rusty parts.
Be sure to use the correct tools for disassembly so there is no further burring of screws and fasteners. If your disassembly reveals primarily surface rust and dirt, you can probably get a good job done with cleaning fluid, brushes and a trip through the ultrasonic cleaner. (If the firearm is equipped with night sight inserts, be sure not to damage the inserts with harsh cleaners).
Once the deep clean is complete and the internal inspection looks good, lubrication and reassembly should get the job done. Be sure to degrease the required parts and properly add Loctite to the screws that require some. Do a safety and headspace check and test function the firearm with dummy rounds before any live-fire testing.
Wise shops document work completed and test fire all final firearm jobs. Sending out a gun without a test fire can result in serious consequences, and no, you cannot expect your customer to complete the test fire for you. If you don’t have a test fire range connected to your business, you will have to factor in travel time and expense, as well as range time and ammunition into your final invoice.
If the project gun gives you concern, be sure to remote fire the gun and inspect for problems after the shot is fired. Conduct remote firing multiple times. Then function fire, test for reliability, accuracy and zero as needed. If all goes well, your customer should get a safe and functional firearm back before hunting season.
Full-Scale Restoration
There are projects that come into the shop in need of full-scale restoration. Some of these projects will make no financial sense, as the labor costs will far out-value the firearm. These are normally cases where a family heirloom of sentimental value needs to be restored to life or customized into a family showpiece that will be kept in the family for generations to come.
The obvious question that needs to be asked is: Do you want to bring the firearm back into its original manufactured condition, or do you want to make it into a show gun, or somewhere in between?
Let’s say the client wants the gun brought back to its original factory blue condition. If you are not familiar with the bluing process, it is best to leave it up to an expert.
In case you’re wondering, here is a summary on what is involved in bluing a firearm. First, disassemble the firearm completely and inspect all the parts. Repair or replace parts that need attention. Chemically remove remaining factory blue and de-rust all involved parts. Degrease all involved parts. Bring the surface parts to the desired condition — polished, brushed or matte surface finish.
Thoroughly degrease all involved parts again. Rinse the parts with purified water. Run the parts through the hot bluing tank for the proper time and at the proper temperature, followed by a hot water rinse, then cooling time in the oil tank. Finally it’s time for the curing rack.
Sound like a hassle? Most people think it is, so it’s often best to leave it up to those who do it professionally.
What about other surface treatments? There are many these days. Some are better than others, but probably only a few will bring a gun into the condition desired by the owner. Communicate with your client and be sure you are on the same page with the work order instructions.
Some owners will prefer hard chrome, nickel, Cerakote, camo or others. If your client is not happy with the final result, all your hard work will be wasted.
Woodwork can have some of the same questions as the metal work. Ask your client if he wants a gloss show stock, semi-gloss or more of a matte hunting finish stock. What is the final color or colors he wants on the “furniture?” Is he trying to match the environment, or a certain set of scope and rings, or the original look Grandpa got when he bought the gun?
Stage one of wood stock work is inspection. If all looks serviceable, strip the stock using a product like Strip X. Let the chemicals do their job, wipe off the undesired finish, then rinse and brush the stock. Repeat as required to get all of the old finish off and make sure to let the stock wood dry out for at least 72 hours.
Then cycle the stock through the oven to draw the deep oils out of the wood, then scrub again and de-oil the stock as much as possible. Move on to any repair work related to dents, splits, chips and cracks. If it is bad enough, some people might replace the entire stock; others will get out the Acraglass and push on with the repairs and restoration.
After the repairs are satisfactory, move on to the staining process. Sand the stock properly with fine grit sandpaper and a sanding block. Apply thin coats of stain, let dry, and repeat until you get the final color and finish your customer desires. Reassemble, test fire, zero, and bring the client in for the final reveal and approval.
What if your customer is looking for a handgun restoration project? It will be a similar process, just fewer square inches of material to deal with.
One of the more common handguns you might see come in with restoration or customization requests is the 1911 pistol. These are projects best left to specialists in the field. Far too many people have attempted to make the 1911 “better” only to destroy its functionality and value.
Entire books have been written about the 1911 and procedures to work on it. Be assured, your work on this design of pistol needs skilled guidance to help assure the project turns out well in the end. That being said, the 1911, or “old slabsides,” can be a great custom project pistol for display, duty or everyday carry.
Just get proper training before taking on such a project, or refer the job to a skilled 1911 specialist.