Each customer has a vision in their head when they enter your store. Your job is to identify that vision and then make it happen.
Some people are practical and merely want a basic gun for home defense. But plenty of your customers want more. No matter what type of customer, they want their weapon to match their vision. That’s where you come in.
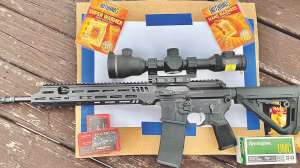
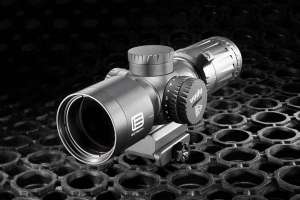
When customers buy a new gun and start thinking about how they can personalize it and make it their own, my recommendation has always been to start with lots of ammunition and developing their skills with the gun. The next is usually new sights. But there’s no problem in reversing those priorities. Sights, after all, make a huge difference in shooting accuracy. Precision shooters will want one type of sight. Combat shooters have different needs.
The gun manufacturers have caught on to how important sights are and usually equip them with pretty good options from the factory. Pretty good, however, still leaves room for improvement.
Your conversation about their intended use will drive you toward the correct sights for the customer. Fortunately, sights are relatively easy to install.

Installation Tips
I’ve installed numerous sights over the years — sometimes using only a punch and a small hammer. That’s still possible today on many sights. However, I’m a little wiser now and use a proper sight pusher for the job. Before we start getting into details, let’s look at some concerns to keep in mind before you begin.
· Look up the gun you’re going to be working on and see if the sights are one-way. Some manufacturers have tapered cuts where the sights should be taken out and installed from one side of the slide. On most Berettas, for instance, sights are pushed out the left side for removal, and the replacement is installed from that side. Other manufacturers' slides are cut the opposite way.
· If you’re installing night sights or ones with plastic inserts for more visibility, you must take precautions against damaging them during installation.
· If using a vice, you’ve got to protect the slide from damage. I’ve seen people use several layers of masking tape on the jaws. Others have used strips of rubber taped in place. Today, magnetized protectors are available that are easy to install and remove and provide excellent protection. Most have varying slots in them to help hold different items. They are highly recommended if you’re going to work on guns.
· Don’t forget the Loc-Tite. Some sights fit loosely and are essentially “glued” in place. Nobody wants their sights to come loose or come off.
· There may be some specialty tools depending on the gun. If working on a Glock, it’s great to have one of the aftermarket Glock tools. They are inexpensive and make life easier. Some Glocks have staked-on front sights. Those also require a unique tool for removal.

Using a Sight Pusher
Sight pushers come in varying sizes and configurations, but they all serve the same purpose: to gently push sights out of their cut dovetail slots without damaging the gun or the sights. I currently use a Real Avid brand Master Sight Pusher and am completely satisfied with it. It works with all my pistols and beats the heck out of using a punch and hammer.
Here are the steps involved:
1. Disassemble the slide from the frame. I’ve not had to strip any of my guns any further than that.
2. Position the slide assembly inside of the tool, being careful to keep it centered and straight.
3. Tighten the clamps that hold the slide firmly in place so that it can’t move as you apply pressure to the sights.
4. Slowly lower the pusher (the part that touches the sights) down and align it with the dovetail groove. The slide must be straight, as mentioned above. It’s also essential that the height of the pusher be adjusted so that it pushes in a straight line. If one side is higher than the other, you’ll be adding additional pressure up or down. Again, the goal is just side to side.
5. Hold the tool steady and slowly turn the knob that moves the pusher. Go slow to ensure that you’re not hitting the slide but only the sight.
6. Continue to turn the knob and slowly push the sight out of the slide.
7. Installation is the same but in reverse order.
8. Use a caliper to accurately measure the sight in the dovetail to ensure it is centered. That’s a great starting point but realize that the sights must be zeroed by firing the gun and making adjustments as needed.
I was pleased to see how well and how easy this was once I had the right tool. I’m even more pleased that my guns now have sights specifically to my taste and needs.

Putting it All Together
Leading a customer to the proper gun is easy. They may have made the decision long before they arrive. Your job is to give advice and information about the pros and cons of their choice. Focus more on the pros. It’s all part of selling and fulfilling that dream.
Once the gun choice is made, move automatically to the discussion of sights based on how they intend to use the gun. Show them a variety of sights on other models to get an authentic feel for the various options available for the type of shooting they will be doing. Stress how vital the correct sights are to achieving accuracy.
There’s a special pride when you shoot a gun that you’ve customized to your taste and needs. Help your customers experience that, and they’ll return time and again for their subsequent add-ons.