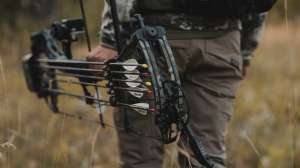
Do you want to create customers and grow bowhunting numbers? Then host a “Field to Fork” program to teach newcomers how to hunt for their meat and then cook it. By teaching them to hunt and developing their outdoor skillsets through classroom and hands-on learning, you’ll build and strengthen the participants’ confidence.
The Archery Trade Association and its partners created a comprehensive guidebook called “Field to Fork: A Curriculum for Mentored Hunts” to help retailers, state agencies, nongovernmental organizations, and others host these programs. Visit www.archerytrade.org/mentoring to download the free digital guidebook. (Please note: You will be required to sign into the ATA’s Resource Website.)
Let’s review the program through a basic seven-step plan.
Step 1: Determine Who's Involved
You’re likely eager to dive in and tackle this adventure alone, but working with partners can enhance the program and lighten your stress and workload. Consider working with community members, state wildlife agencies, conservation organizations, and local farms and restaurants. Personally invite clubs or groups that deal with food, cooking, hunting or conservation. These partners can provide mentors, equipment, land access and credibility.
When first meeting your partners, discuss your combined strengths, weaknesses, program goals, and target audience, and how you can work together to create a great experience for all participants. By understanding each partner, you can better define responsibilities, and craft an efficient, realistic schedule.
Step 2: Create a Timeline
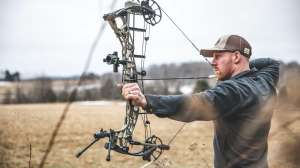
A well-rounded “Field to Fork” program includes training sessions, a mentored hunt, a culinary social, and follow-up activities. Determine when and where to hold the hunt — the highlight of “Field to Fork” programs — and coordinate other events accordingly.
You must factor in hunting seasons, regulations, holidays and area events to ensure you pick an ideal day for participants. Hold the mentored hunt early in the season so they can continue hunting after attending the program. Remember: A “Field to Fork” program highlights the hunting experience. Give participants time before the hunt to practice and prepare, and time after to improve their skills and seek more hunting opportunities.
Your program’s schedule should include several weeks to market and advertise the event, and then choose its participants. The ATA’s template for a “Field to Fork” timeline can be found in the guidebook and on the Resource Website at www.resources.archerytrade.org.
Step 3: Establish Prehunt Activities
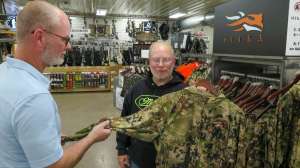
Next, brainstorm and create training sessions to give participants a holistic view of hunting and its necessary skills. Training can be done afield and in classrooms. Sessions should be interactive. Engage participants with gear overviews, shooting lessons, scouting adventures, hunter-education coursework, and mentor/mentee meet-and-greets. Make sure you teach them what they must know about the species they’ll hunt, shot placement, and hunting regulations.

Step 4: Logistics and Administration
Assign dates, times and locations to each event, and then find volunteer mentors and places to hunt. Your partners likely know accommodating people and places. If not, ask around.
If possible, hunt lands that will provide access to participants after they finish the program. That way, they’ll feel more comfortable returning for a solo hunt. Also consider travel times to and from the hunting spot. Convenient locations benefit everyone.
The number of mentors you recruit dictates the program’s size. Seek mentors in schools, churches, and outdoor clubs. Consider a mentor application and selection process. Give prospects the schedule to ensure they’re available. Mentors don’t have to attend prehunt activities, but their participation strengthens their bond with mentees. Include a training session for first-time mentors.
Determine your target audience, which includes outdoor recreationists, food enthusiasts, and others who lack social support to start hunting. Use an application process to help select those who will benefit the most. The guidebook suggests information to include on the application.
It’s OK to start small. These programs can make or break participants’ hunting interests, so it’s better to create a high-quality experience for a small group than a mediocre experience for a large group. If the event succeeds, consider expanding it next time. Encourage participants to recruit friends and share their experiences to fill your next program.
Step 5: Marketing and Advertising
Advertise. Advertise. Advertise.
Identify where your target audience hangs out. Go there and share your program.
Hand out flyers at events, or post them in stores, schools, libraries, or on public bulletin boards. Go digital, too. Promote your program on your website and social-media accounts. Contact media to cover your program on TV, radio or in newspapers. Also, ask your partners to share the program’s details by word of mouth and through their organizations’ email, websites and social media.
Comb your community for participants. Don’t assume they’ll come to you. The “Field to Fork” guidebook recommends spreading the word at farmers’ markets, community festivals and other community events.

Step 6: Pick Your Participants and Go
The application questions you created in Step 4 help you narrow and select your candidates. Choose them based on your program’s goals. Do you want adults who have hunted occasionally but lack the social support to continue? How about young adults who have never hunted? Or are you seeking “foodies” who want to “source” local meat themselves?
Notify your lucky participants, send them the program’s schedule, and discuss expectations at your first meeting. Allow time for a Q&A session, and remind them of the next meeting and supplies or gear they’ll need. Provide support during and after the program to ensure they feel comfortable and confident. Consider creating a closed Facebook group so participants can discuss their feelings and experiences. Also, consider follow-up opportunities to help them stay connected and actively hunting. The guidebook provides activity ideas.
Step 7: Evaluate the Event and Process
Take notes during the program to identify areas to improve. Send participants a survey after the program for feedback about their experience, what they learned, and how confident they became. Also consider surveys six months and a year later to learn if they kept hunting, and if they need more support or information.
Visit www.archerytrade.org/mentoring to download the “Field to Fork: A Curriculum for Mentored Hunts” guidebook. Josh Gold, ATA’s senior manager of R3 and state relations, can offer more tips, advice and help for creating programs and connecting with partners. Contact Gold at joshgold@archerytrade.org.