“It’s tough to make predictions, especially about the future.”
I doubt Yogi Berra intended this quote to describe rifle scope performance, but it works pretty well. When you take a scope out of the box, you can count on it making decent predictions where bullets will impact at varying distances.
However, these predictions of future performance won’t be precise until you take some steps to calibrate the scope with your rifle, specific ammunition, and local atmospheric conditions.
Vertical Calibration
Step one, before anything else, is to make sure that the scope is level. We want the vertical crosshair to be exactly perpendicular to the receiver. If it’s slanted at all, you’ll experience point of impact errors. The more the bullet drop, the greater the error. The error occurs because the calibration of the scope and its elevation adjustments follow the reticle line. If the reticle isn’t vertical, the predicted drop no longer matches the exact vertical drop of the bullet. It’s almost like throwing a curve ball instead of a straight sinker.
So, how much can a misaligned scope throw you off? If your scope is off vertical by just 2 degrees, you can have a windage miss of over 10 inches by the time the bullet drops 300 inches. That sounds like a lot of drop but a standard .308 drops over 400 inches by 1,000 yards.
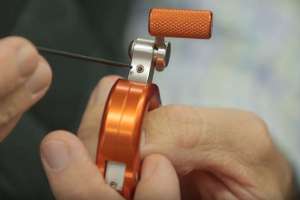
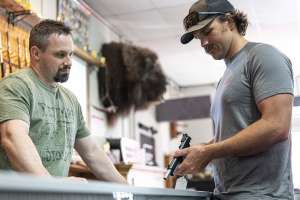
There are several ways to make sure that your scope is mounted properly. I use a tool called the Scope Setter. This product is a receiver rail with adjustable legs. Simply level the unit, mount your scope rings to the Scope Setter base, then mount the scope to the rings, using the included level to make sure the scope is level relative to the base unit. Once the rings are tightened to the scope, loosen the ring bases from the Scope Setter and move the rings and scope to the rifle. This way, the scope and rings are in perfect alignment with each other before you move everything to the rifle receiver.
If you don’t have a Scope Setter, you can lock your rifle in a rest and adjust until the receiver is perfectly level. Then, without moving the rifle, mount the scope, using a small level to make sure the scope is also level. Last, you can choose the budget method and rest the rifle on a level surface and look through the scope at an object that’s exactly vertical, like a straight doorframe or vertical line drawn on a target. Just line the vertical crosshair up with the object and tighten the scope rings. Know that any of these methods can still leave you with a degree or two of error so be as precise as possible!
Of course, part two of this process is to make sure that the rifle is level when you shoot, otherwise all the scope leveling will have been in vain.
What’s an MOA?
In the random trivia category, you may want to know if your scope manufacturer uses the true minute of angle value of 1.04 inches per 100 yards or the “estimate” of 1 inch per hundred. You’ll find examples of both out there. It’s not a huge deal though. At 500 yards, that introduces an uncertainty of just .20 inches and less than a half-inch at 1,000 yards.
Ballistic Drop Compensation
Some scopes come with fancy reticles (and sometimes turrets) that are pre-marked for certain ammunition types. If you buy a scope with a BDC reticle graduated for, say, .308 Winchester, you can hold over using the appropriate reticle hash marks to hit targets at designated distances. Do they work? Yes, sort of. Most of the time, these types of reticles will get you close.
Here’s the gotcha. By necessity, reticle designers have to average out results. A single caliber reticle can’t possibly account for all the potential variables that determine actual bullet drop. These factors include, but are not limited to, air pressure (altitude), bullet weight, bullet profile, temperature, barrel length and actual bullet velocity.
So, if you want absolute precision you must test and verify your rifle, specific ammo choice and the BDC reticle so see exactly where the point of impact is at the reticle’s indicated distances. You might find that the 600-yard hash mark reflects 550 or 675 yards. As long as you know, that’s OK. As we’ll talk about in a minute, these results only apply when shooting in similar atmospheric conditions.
Accurate Adjustments
With a new scope, it’s important to make sure that a click is really a click. If each click is supposed to adjust ¼ MOA or .1 mils, you’ll want to make sure it does in fact do that.
One thing I like to do with a new scope is check out its ability to make accurate adjustments, even sizable ones, and return to its precise zero point of impact after a bunch of dial spinning. The good news is that you can do this at a standard 100-yard range with a simple shoot-the-box test.
Using a good rest and ammo of known accuracy (less than 1-inch groups at 100 yards) start by firing a three-shot group at the center of a large target. Next adjust your scope significantly down and to the right. With a reasonable target size, you can adjust 10 inches down and 10 inches to the right. That would be 10 MOA or about 2.78 mils. If you have enough room on the paper, make an even larger adjustment.
Then, continue to hold the crosshairs on the center aiming point from step one and fire another three-shot group. This group should end up 10 inches below and 10 inches to the right of your initial center group. Now adjust your scope 20 inches (20 MOA or 5.55 mils) up and fire another three-shot group. Repeat the process with a 20-inch adjustment to the left and a 20-inch adjustment down from there. Last, spin the scope turrets back to zero elevation and zero windage and fire one more three-shot group, taking care to pay attention to which three holes were from your initial shots.
The result of all this shooting and spinning will be a big square, 20 inches on a side with the four corners being defined by three-shot groups. If you find the center of each group and make a mark there, the square should be nearly perfect and exactly 20 inches on a side. This is a simple way to verify that your scope adjustments are moving the point of impact by precisely the right amount. You should also see one big group of six shots right in the middle. If you get this result, you now know you can make big adjustments to your windage and elevation and when you return to zero, you’re still right where you should be. A quality scope will pass this test with flying colors. A lesser scope might leave you with a lopsided square and two distinct groups in the center.
Scope Olympics
Once you know your elevation and windage clicks are precise and repeatable, you can check out some predictive adjustments by playing some scope-o-lympics, again at a fixed distance of just 100 yards.
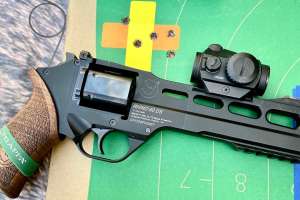
I used a large multi-target sheet to check out a new Crimson Trace CSA-2416 4-16x50 scope. Once it was zeroed and after I shot a respectable box pattern, I fired a three-shot group at the lower left target. The next target up had its bullseye exactly 11.125 inches above the lowest one, so I made an elevation turret adjustment of 11 minutes of angle. Since each click is ¼ MOA I had to average between 11 and 11.25. Again, I aimed at the original bottom target bullseye and fired another group. These three shots landed right where expected on the next target up. Flushed with success, I made an additional 11.25 MOA adjustment, figuring that 22.25 MOA would put me on the bullseye a full two targets higher on my sheet. Again, the group landed right where I wanted. Just for kicks, I moved an additional 10.75 MOA to the right (43 clicks) to try to hit the upper right bullseye, which was laterally spaced exactly 10 ¾ inches away. At this point, I wasn’t surprised to be exactly on target as predicted once again.
The point of all this was to verify that click adjustments were consistent and predictable. My maximum adjustment was 22.25 MOA vertically, which would translate to nearly a 1,000-yard adjustment when firing a suitable cartridge like 6.5mm Creedmoor. In this case, I did it all at 100 yards using placement on target to make sure the scope was doing its job.
Range Card Calibration
While prediction is great, the only way to match a scope to the exact trajectory of your rifle and pet load is to shoot it — a lot.
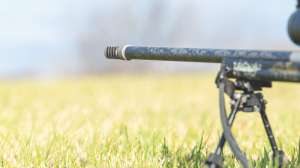
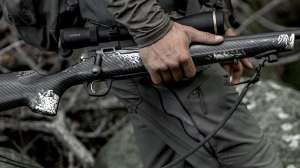
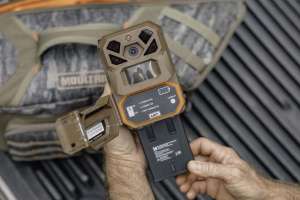
Whether you just keep meticulous notes or use a pre-formatted set of range cards like the Magpul system shown in the photos here, you must shoot your specific ammo at a variety of distances and verify the exact scope adjustment required to match point of aim and point of impact. Your ballistic software will get you close, but it will never make an exact prediction, so you must test and record the results.
For example, as you can see in the photos here, I’m just starting the process of recording the exact elevation adjustments required for a Masterpiece Arms BA Lite Rifle with a Steiner T5Xi scope and a specific hand load. Given my actual measured velocities, I can use ballistic software to predict by bullet drop and necessary elevation adjustment in milliradians, which the Steiner scope uses.
The math shows that at 300 yards (with a 100-yard zero) I should have to adjust up 1.09 mils. At 600 yards, 3.46, and at 800 yards, 5.24. To find out if these estimates hold true, I did some shooting at those three ranges. I found out that the actual scope adjustment for 300 yards was 1.2 mils. For 600 and 800 yards, adjustments were 3.9 and 6.0 mils exactly. So rather than rely on what the ballistic computer says, I now know exactly how much I need to adjust for those distances. Over some upcoming shooting outings, I’ll continue to work on my range card and fill in the 50-yard increments from 150 to 1,000 yards.
That doesn’t sound too work-intensive does it? Well here’s the kicker. All of that range and adjustment verification only applies for atmospheric conditions similar to when you zeroed and tested. If your weather changes significantly or if you travel to an area of higher or lower altitude, you must verify all over again. The Magpul system shown here uses “zones” of density altitude to allow you to record data for different conditions.
For example, I live in South Carolina near sea level, so I’m starting with recording the data for the density altitude zone of 500 to 3,000 feet. If I head out to Rock Castle Shooting Center or out west, I must test and fill out a new card to get the right dope for those conditions. Hey, at least all that long-range shooting is fun.
Here’s the bottom line. A scope comes out of the box with the ability to make windage and elevation adjustments. However, until you verify that a click translates to what it says by putting rounds on target, you don’t really know. The more you can “exercise” your scope by making large adjustments and trying to return to a consistent zero, the more confidence you’ll have that you can make a first-shot hit at longer range.