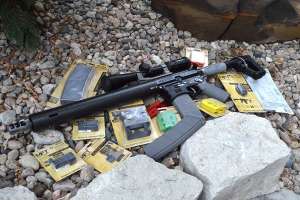
The hands-on part of changing out stocks and buffer tubes on AR-type rifles is relatively easy. However, knowing the right parts to use is where things can get a little squirrely. That’s because we “gun people” can never seem to make anything easy. Not only are there four styles of stocks, but two of those use recoil buffer tubes (or receiver extension tubes) of different diameters. We’ll get to that in a minute.
There are two different upgrade opportunities when it comes to stocks and the associated buffer tubes and recoil components. You can simply swap out the buttstock itself for an upgraded version of a compatible model, or you can change the “type” of stock system on a rifle. For example, say a customer has a carbine-style rifle with the standard adjustable buttstock, and they want to change it into something more nostalgic like an A1-type rifle with a fixed buttstock.
Before we get into the mechanics of this process, we need cover the variety of sizes and specifications out there. For AR-type rifles, there are four different buttstock systems.
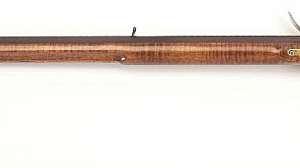
A1 Rifle
The original A1 stock system seen on Vietnam-era M16A1 rifles is the classic fixed triangular stock. While it looks big, it’s fairly compact and was originally designed to fit a wide variety of shooters — you know, the Army’s “one-size-fits-all” way. The idea was to use a stock size and length of pull that facilitated a “face-forward” combat style of shooting.
A2 Rifle
The A2 variant added 5/8-inches to the stock length. To keep things supported inside, the A1 buffer tube uses an extension and a longer screw to mount the fixed stock to the buffer tube.
Carbine (Mil-Spec)
The mil-spec carbine buffer tube has an outside diameter of approximately 1.14 inches. If you measure with calipers, you’ll find that they might vary a bit as there’s a little bit of slop in many buffer tube and stock mounts. To keep things simple, if you see 1.14 anything in your measurement, it’s a mil-spec diameter tube.
Carbine (Commercial)
Commercial buffer tubes measure approximately 1.17 inches in diameter, which is slightly bigger than the mil-spec version. Why? Got me. Again, you might see a third digit in your measurement, but it’ll work as long as the first two digits after the decimal start with “17.”
Changing the Buttstock Only
Step one is to make sure you’ve got the right parts. Even for a simple no-tools-required installation, you need to order the right buttstock replacement for the buffer tube in question. Most stock vendors are clear about labeling the stocks commercial or mil-spec.
Assuming no changes are needed or desired for the buffer system itself, swapping the stock is a 15-second ordeal.
For fixed-stock rifles, you’ll usually find a retention screw in line with the rear of the tube. You might have to dig underneath a recoil pad if there is one.
With either system, changing the buttstock is as easy as slipping one on. For a fixed rifle stock, worst case is you’ll have to screw the stock to the receiver extension tube.
Changing the Receiver Extension Tube and Recoil Assembly
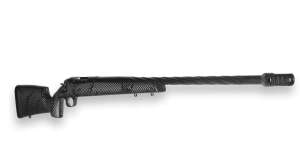
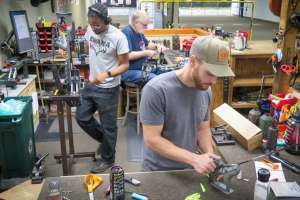
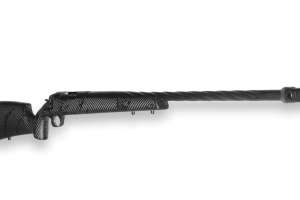
If you want to do a more in-depth stock facelift, you’ll need to break out the tools. Examples of this kind of outpatient surgery might include changing a standard carbine adjustable stock rifle to one with a fixed stock. You might have an itch to convert a carbine to more of a classic design with an A1- or A2-style stock. Or perhaps your customer wants to add something more modern, like the Lancer Systems carbon fiber model shown in this article. Either way, you’ll probably need to swap out the buffer tube, buffer and recoil spring.
You’ll want a couple of basic tools, including a vise block to hold the lower receiver, a buttstock tool or combination armorer’s wrench, a hammer, a punch pin and a torque wrench.
Earlier we talked about the different stock configurations such as A1, A2 and the two types of carbine stocks. When you get under the covers of these, you’ll also see that the buffers themselves are different, too. While there are an infinite number of performance variations, buffers come in two sizes — carbine and rifle. To ensure reliable operation of the rifle, be sure to use the right one.
Removing the Existing Receiver Buffer and Receiver Extension Tube
Removing the buffer tube and recoil spring is easy. After separating the upper and lower receivers, you’ll see the face of the buffer itself in the rear of the lower receiver. It’s held in place with a spring-loaded retention pin. Using a flat head screwdriver, or even your finger, press this pin down while allowing the buffer to exit the receiver extension tube.
Removing a carbine receiver extension tube requires a few more steps. Once the lower receiver is locked into a vise block, use the buttstock tool to loosen the receiver extension nut.
Once you rotate the extension tube nut back a half-inch or so, you can begin to unscrew the buffer tube from the lower receiver. There are also two springs ready to launch if you’re not ready for them. The buffer retention pin and spring will fly open as soon as the buffer tube moves back far enough that it no longer holds the retention pin in place. Be ready for that.
Also, on the ejection-port side of the back end of the receiver, you’ll see a small spring protruding toward the receiver endplate that applies pressure to the rear takedown pin. This one will also drop out if you’re not careful. Now that you’re tracking those easy-to-lose springs, go ahead and unscrew the receiver extension tube all the way out.
On a fixed stock configuration, the stock itself holds the takedown spring and detent pin in place, so if you removed the stock, you would have seen the exposed takedown pin spring. On a carbine design, there is no stock surface area there to hold the spring in place, so the endplate is used.
Installing a New Receiver Extension
Because we just removed a carbine style buffer tube in our example, it’s likely that you’ll be replacing that with a rifle-length extension tube for a fixed stock configuration.
Fortunately, that’s even easier as there are fewer parts. First, screw the new buffer tube into the lower receiver until it’s almost ready to start covering the buffer retention pin hole. Now, drop the buffer retention spring and pin into the hole and hold it down using a finger or flat-bladed screwdriver. Continue screwing the buffer tube into place until seated. At this point, it will cover the base of the buffer retention pin and keep it in place.
Next it’s time to break out the torque wrench. Most armorer’s and buttstock tools have a .5-inch driver hole specifically for this use. Insert the torque wrench, attach the tool to the rifle tube or receiver extension nut (depending on which one you’re installing) and tighten it down to 35 to 40 foot-pounds.
If you’re installing a fixed stock, the next step is to re-insert the takedown detent pin and spring into the rear of the lower receiver. A fixed stock simply slides over the buffer tube and presses the spring into the receiver, thereby holding it in place. The last step is to screw the buttstock into the back of the receiver extension tube, taking care not to disrupt the placement of the takedown detent spring.
If you’re installing a carbine tube, the process is almost the same, except you have two different parts. You’ll need to screw the receiver extension nut onto the buffer tube with the wrench cuts facing the rear before screwing the buffer tube into the receiver. Because the shorter buttstock of the carbine doesn’t reach all the way to the receiver, you’ll also need to install a receiver endplate. This holds the takedown detent pin and spring in place.
As with a rifle receiver extension tube, you’ll want to torque the extension tube nut into place with 35 to 40 foot-pounds of force. Last, but not least, you want to use a hammer and punch pin to stake the receiver extension nut in place. You’ll see a couple of small notches on the receiver side of the nut. Using the punch pin, drive a little bit of the material from the endplate into that notch to prevent slippage of the extension nut over time.
The process is fairly straightforward once you understand how the parts go together. If you disassemble slowly, you’ll see the two spring and detent pin systems and how they fit. That’s the major headache as they’re easy to kink and bend when reassembling. Of course, like any project, the more you invest in quality tools, the easier the work and the reduced likelihood of scraping up parts.